Taking inaccurate measurements can quickly turn a kitchen renovation into a costly headache. Cabinets may not fit, appliances may sit unevenly, doors may swing the wrong way, countertops may end up too high or too low, and electrical or plumbing connections can become difficult-or impossible-to reach.
These problems are more common than most homeowners expect. In many cases, they happen simply because the kitchen wasn’t measured carefully enough. If you plan to measure your kitchen yourself, precision is essential. Even small errors can affect the final layout. This guide explains how to measure a kitchen correctly and provides a clear checklist to help ensure your planning process stays on track.
Measuring a Kitchen Properly: What to Keep in Mind
Accurate measurements are the foundation of good kitchen planning. Even minor inaccuracies can lead to cabinets, appliances, or countertops that don’t fit the space as intended. A simple rule applies: always measure twice. Even if you’re working from an existing floor plan, it’s important to verify all dimensions yourself.
Construction drawings and real-world conditions often differ slightly. When measuring your kitchen, take your time and work carefully. Every inch matters. Measuring with a second person is highly recommended. Having an extra set of eyes makes the process faster and helps you spot slanted walls, uneven floors, or small irregularities that should be accounted for during planning.
What Exactly Needs to Be Measured in a Kitchen?
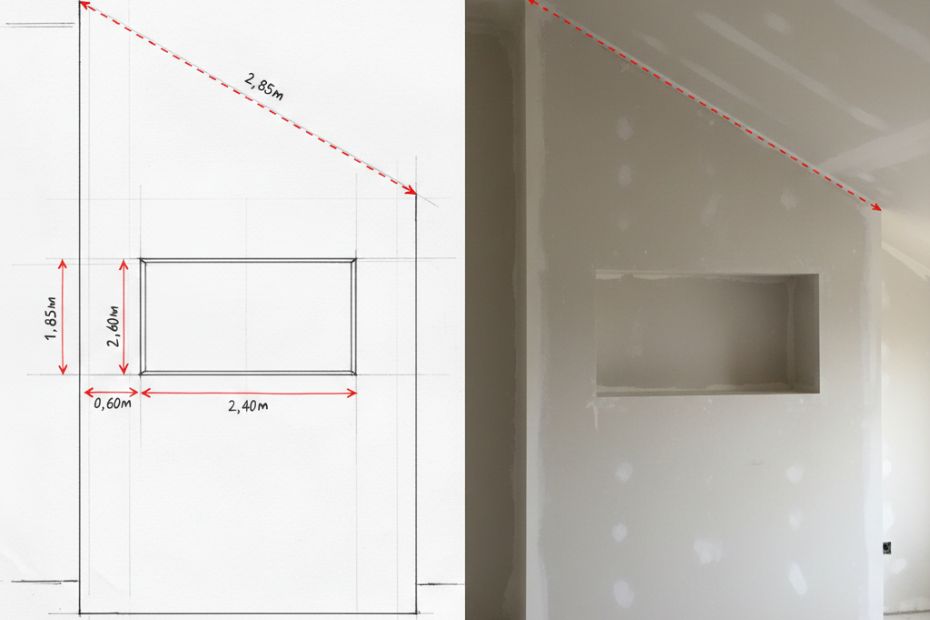
Sloped ceilings, niches, and wall cutouts must be measured precisely to avoid planning errors.
A scaled floor plan is only the starting point. For accurate kitchen planning, all architectural and technical details need to be documented. This includes windows, doors, radiators, outlets, lighting connections, and water or gas lines. Structural features such as wall bumps, niches, angled walls, and ceiling height variations are just as important. Ceiling height deserves special attention. It can vary noticeably within the same room, which can affect tall cabinets or upper cabinetry.
Be sure to measure and record:
- Overall room dimensions (length, width, and height)
- Wall angles and corners
- Window placement and window sill height
- Door dimensions and swing direction
- Sloped ceilings, soffits, or bulkheads
- Wall protrusions and recesses
- Electrical, water, and gas connections
- Radiator or baseboard heater size and location
- Existing or planned lighting points
- Venting options and wall or ceiling openings for a vented range hood
Checklist: How to Measure Your Kitchen Step by Step
1. Create a Detailed Floor Plan
Start by measuring the entire room. Record the length, width, and height of each wall, as well as the ceiling height. Note any ceiling-mounted lighting or fixed structural elements. Measurements should always be taken in more than one spot. Ceiling height, for example, often varies slightly across a room and shouldn’t be assumed to be uniform.
2. Measure Windows and Doors
For windows, measure the width, height, window sill height, and the position of the header. For doors, note the frame dimensions, door width and height, and the direction the door opens. All of this information should be clearly marked on your floor plan.
3. Document Electrical, Lighting, and Gas Connections
Measure and record the exact locations of electrical outlets, light switches, appliance hookups, water lines, shut-off valves, and radiators. This step is critical to ensure appliances can be installed and connected as planned. If you’re considering a vented range hood, be sure to measure any existing wall or ceiling openings for exhaust ventilation.
4. Note Materials and Structural Conditions
If you’re keeping the existing flooring, you can use those measurements as-is. If new flooring is planned, record the material and thickness. Even small changes in floor height can affect cabinet installation and appliance alignment. Also take note of wall and ceiling construction. Heavy cabinets should not be mounted on weak or unsupported surfaces. If the ceiling is hollow or suspended and you plan to install hanging elements, this needs to be addressed during the planning stage.
5. Plan for Delivery and Access
Measuring your kitchen also means thinking beyond the room itself. Consider delivery and installation logistics early on. Ask yourself:
- Is there an elevator, or only stairs?
- How wide are hallways and doorways?
- Will large cabinets and appliances fit through every access point?
Overlooking these details can create serious problems on installation day.
Measuring a Kitchen in a New Build or During Construction
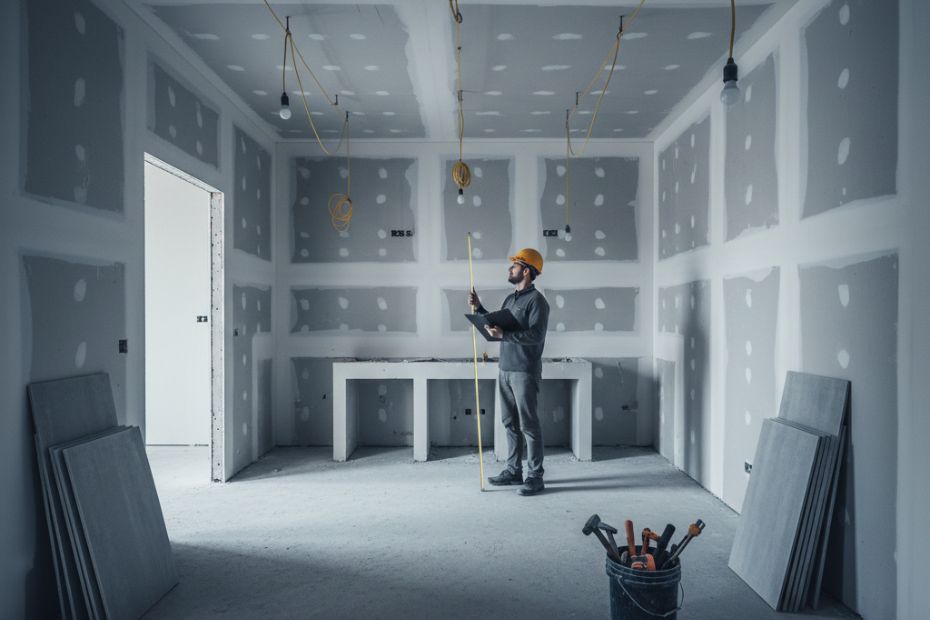
A common question is whether a kitchen should be measured during the construction phase or after the space is finished. The answer is straightforward: final measurements should never be taken during the rough construction stage. Accurate measurements are only possible once floors are installed and walls are finished. Only then does the space reflect its true dimensions, including uneven surfaces, slopes, and final wall thickness.
Helpful Tools: Measuring a Kitchen With a Laser
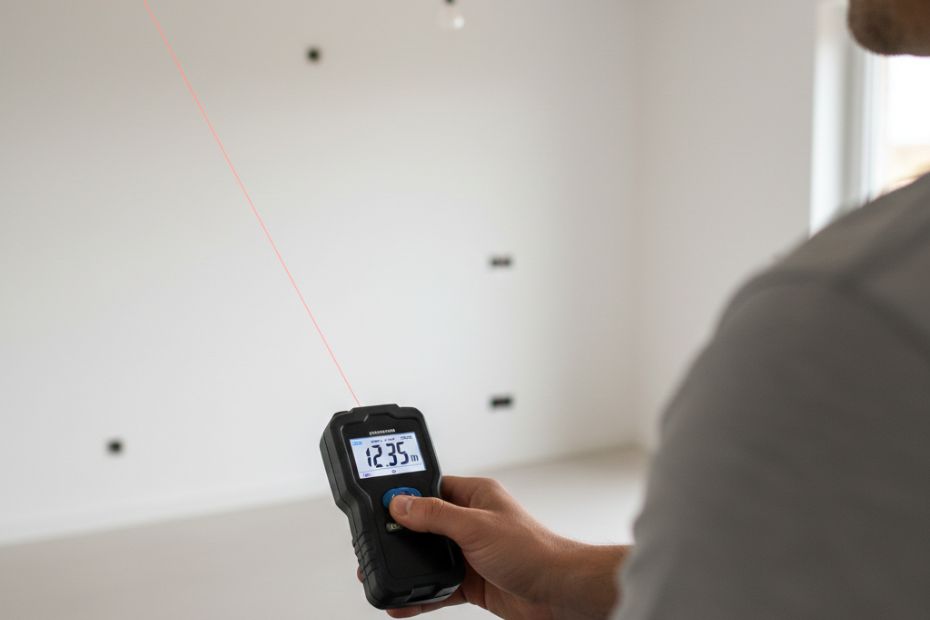
Laser distance tools allow fast and highly accurate kitchen measurements, even in complex layouts.
A kitchen can be measured using a standard tape measure, but laser distance measuring tools offer greater accuracy and convenience. Laser tools are especially helpful in rooms with sloped ceilings, uneven floors, or complex layouts. They allow distances to be measured quickly and precisely. Laser measuring devices can be purchased or borrowed from kitchen studios or home improvement stores. If 3D laser measurement is available, it provides the highest level of accuracy and is well worth considering.
When to Have a Professional Measure Your Kitchen
For complete peace of mind, having your kitchen measured by a professional is often the best option. Experienced specialists know how to identify and document even small irregularities and are familiar with required clearances for appliances. Many kitchen studios and custom cabinetmakers include professional measurement as part of their service. Larger retailers may charge a fee, but professional measuring can help prevent costly mistakes later in the planning and installation process.